Rocket Fine         Handmade Knives graphic page header

Rob Davidson - Maker

Knives From the
Texas Hill Country

Since 1978

830-798-7744

Home Fixed Blades Folding Knives Available Knives Scrimshaw Contact


Rocket Fine Handmade Knives graphic logo


Rocket Knives Tutorials


Rocket Fine Handmade and Custom Knives graphic logo


How-to Make a Liner Locking Folding Knife


Rocket Fine Handmade and Custom Knives graphic page divider
This page is created for those that have been wanting to know
how to go about making a liner locking folding knife.
This is a short archive of most of the steps involved
with the knifemaking process.


Please keep in mind that this is only one way out of very many ways to accomplish the same thing.
What works for me may not work for you.
This is intended as a guide to get started and assist in basic knowledge. Have thoughts or ideas??? Let me know.

Rocket Handmade Knives Tutorial on How-to make a liner lock

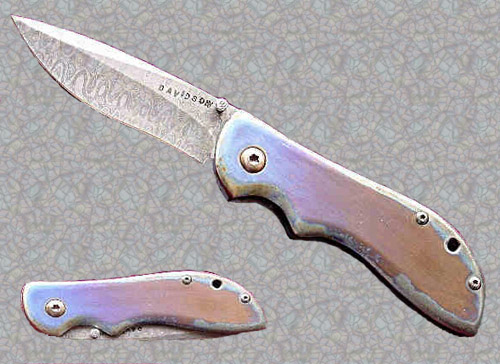
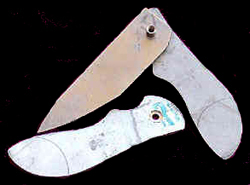
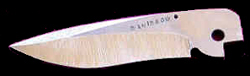
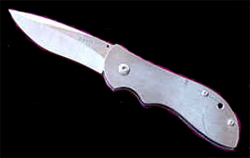
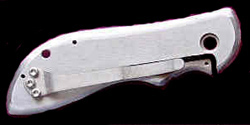
Above shows the finished piece for this tutorial.
Scroll down to see the steps taken to make this piece possible.


Rocket Knives tutorial shows a blank steel bar to start

This is where it all starts.
One piece of stainless snakeskin damascus steel.
The blade will be sawn from this bar.

This pic shows a closer view of the
damascus steel bar.
It is partially etched to show the pattern.

Rocket Knives Liner Lock Tutorial shows a close-up of the beginning steel stock
Rocket Knives Liner Lock Tutorial shows the titanium plate used to make the liner 
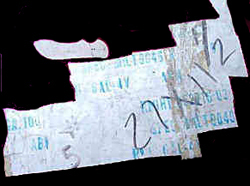
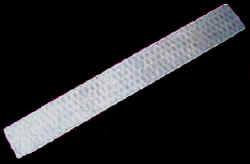
A sheet of .100 thickness titanium.
This will be used as the liner/frame
for the knife. Notice that there is
a pattern next to the sheet.
This is the pattern for the medium-sized
tactical folding knife and the
pattern for this project.
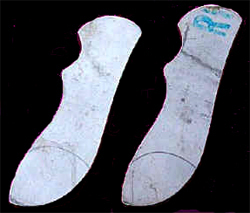
Two liners sawn from the
titanium sheet above.
These liners have already been
profiled with the belt sander.
This leaves a very smooth outside line
and make the frame pieces the same size.
Rocket Knives Liner Lock Tutorial shows the sawn liners
Rocket Knives Liner Lock Tutorial shows the blade and sawn liners together

Now there are two liners and a
blade sawn. The blade will be just about
1/4"shorter than the length of the frame.
These parts are the beginning stages and
now have to be properly mated.

Before we can continue, the blade needs
to be parallel at the spine and the cutting
edge and the tang end needs to be
perpendicular to those.

Rcoket Knives Liner Lock Tutorial shows the blade being squared
Rocket Knives Liner Lock Tutorial shows the blade mated to the liners

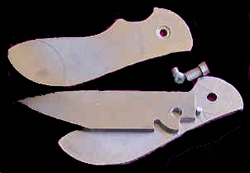
Blade installed. Two liners and a
damascus steel blade joined by a
male-female type pivot screw.
The location of the pivot is somewhat
critical, but at the same time, hard to
explain where it should be.
But, somewhere slightly below the middle
of the blade vertically, about 3/8" from the
tang end of the blade.
Once the blade hole is drilled,
line the blade up on the frame
and drill the frame hole.

The blade is now notched for the lockbar.
Notice the angle at which the notch is
cut.....This is to allow the lock bar to lock
up tightly and stay tight.

Rocket Knives Liner Lock Tutorial shows the lock indent being cut
Rocket Knives Liner Lock Tutorial shows lock space finished

The profiled liners with the notched blade.
Now the stop pin has been installed.
There are lots of ways to install the
stop pin. And lots of different stop pins.
I use use a screw inside of a
stainless tube, allowing a bit more
support at the stop pin.

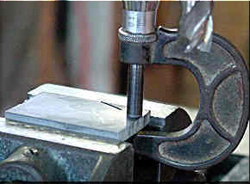
Inserted into the vise is a small piece
of G-10 to use as a butt piece spacer.
The piece of G-10 is now .202" and needs
to be milled down to .136" for a perfect
thickness with the other internal parts.
The blade is .116" thick and the
2 washers are .010" thick each.

Rocket Knives Liner Lock Tutorial shows the fitting of the backpiece
Rocket Knives Liner Lock Tutorial shows the finished blade ready to heat treat

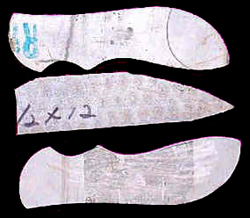
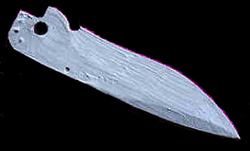
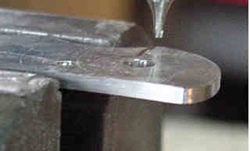
The blade has been profiled and ground.
A hole was drilled and tapped to
accept the thumbstuds.
Blade is ready for heat-treatment.

Blade coated with a compound to
prevent scaling during heat-treatment.
The compound is allowed to dry.
Touch-ups may be needed to insure
that the blade is completely covered.

Rocket Knives Liner Lock Tutorial shows the coated blade to be heat treated
Rocket Fine Handmade and Custom Knives graphic page divder

A Note About Heat Treatment


I use a heat-treatment coating because it works best for me.
Many makers use steel foil, some use other coatings such as Turco,
some use nothing at all. A bigger trend has gone towards
using professional heat-treaters. These guys do a good job
at a fairly reasonable price. I do my own heat-treating because of the down-time that is involved with professional shops and
because I prefer to do it myself.
Bottom line, though....if you don't know anything about
heat-treatment of steels, get a professional.
If you want to learn to do your own, at least get documentation
that will tell you how and what happens when you
put a piece of steel in an oven @ 1900 F.
Believe me, it will pay of in the long run.
Whether you do your own heat-treating or not.

Rocket Knives Liner Lock Tutorial heat treatment oven

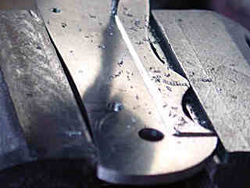
Blade heat-treatment.
The coated blade is going into a
cool oven and is heated, for this type of
stainless damascus steel to 1925 F.
The blade is allowed to "soak" at this
temperature until the blade is
thoroughly heated (about 20 minutes).
Some steels require pre-heat.
Pre-heating is a good idea for most steels.

Heat-treated blade. Some of the
coating remains, but is easily
ground away after tempering.
This type of damascus steel will
temper @ 400F for 2 hours, put in the
freezer overnight and again heated to
400F for 2 hours. The blade is ready for
clean-up and the knife will be ready for
assembly and final shaping.
Rocket Knives Liner Lock                     Tutorial heat treated blade
Rocket Knives Liner Lock                     Tutorial all parts

All parts ready for final clean-up and
assembly. The back spacer has been
drilled and fitted and holes are
countersunk on one side of the frame and
tapped on the other. Pass holes are drilled
into the back spacer. The back spacer is
ground in a shape that will conform to the
blade edge, when the knife is in the
closed position. .010" Washers are added
to each side of the finished blade for ease
in opening and closing.

The blade has been cleaned up and all of
the parts assembled. Make sure that
everything lines up and the blade works
freely. The pivot nut is ground down until
the proper length is attained to tighten
down the pivot screw without putting it
into a bind. After fitting is done, we can
mark the place to cut the lock notch.

Rocket Knives Liner Lock                     Tutorial all parts assembled
Rocket Knives Liner Lock                     Tutorial parts ground A mark has been made for the place to
cut the notch for the lockbar.
The short cut across the frame is
being made. This is the part of the
lock that will rest against the notch in the
blade to hold it securely open.
Be sure to leave a little "extra" to
grind to make a perfect fit.
With the short part of the lock cut,
we can now cut the length of the frame
to finish up the locking bar.
This cut is to make the lock flexible and
work back and forth inside the
blade notch to lock the blade in place
and to help to keep the blade shut
when it is supposed to be shut.
Rocket Knives Liner Lock                     Tutorial lock cut
Rocket Knives Liner Lock                     Tutorial lock finished The lock bar cut and fitted.
The knife is once again assembled.
We can now proceed to make the
final grinds and contours to the frame
to finish this knife up.
The blade still needs final grinding and
hand sanding before it is etched to
bring out the pattern in the stainless
damascus steel blade.
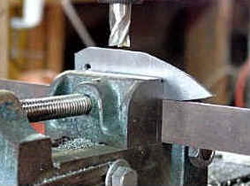
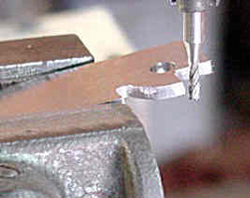
After the frame has been contoured,
the knife is disassembled to attach
the pocket clip. Notice how the clip rests
on the lockbar for extra support for
the lock. A hole is drilled into the lockbar
for the detent ball. The detent ball is used
to hold the knife blade shut when the
blade is supposed to be shut. A matching
hole is drilled into the blade. The blade is
hardened, so a diamond drill is used.
Just a few thousandths of an inch
is plenty.
Rocket Knives Liner Lock                    Tutorial pocket clip added
Rocket Knives Liner Lock                    Tutorial blade etched 
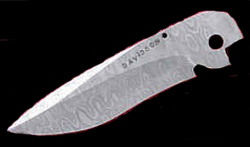
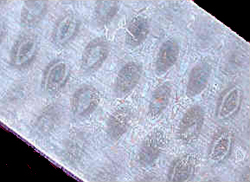
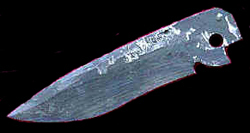
The blade heat-treated, cleaned-up
and then etched with ferric chloride.
A final polish with 600 grit sandpaper
(or finer) bring out the pattern
in the steel. The blade is completed
and ready for installation into
the finished frame.
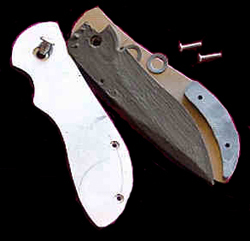
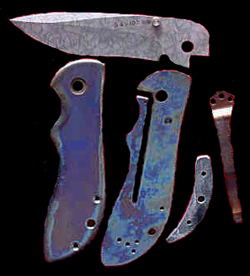
All parts ground, hand sanded
and the titanium parts are heat-colored
in the heat-treatment kiln.
The clip is also heat colored.
The thumbstuds are attached by using
a shortened threaded shaft screwed into
both thumbstuds and the blade.
Next step is to assemble the piece
and fine-tune. Washers are not shown
here, but are necessary!!!
Rocket Knives Liner Lock                     Tutorial parts colored
Rocket knives Liner Lock                     Tutorial completed

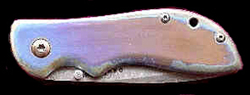
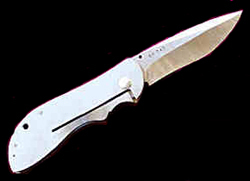
Knife completed and assembled.
Thumbstuds are checkered.

Rocket Fine Handmade and Custom Knives graphic page divider

Home
| Available Knives | Folding Knives | Fixed Blade Knives | Scrimshaw | About | Contact | Tutorials | Links

Copyright © 2004-2020 Rocket Knives | Rocket Web Design. All Rights Reserved.